How Do Professionals Clean Vinyl Floors
Posted by Suji Siv @Clean Group on 2024-02-09
How Do Professionals Clean Vinyl Floors
Vinyl flooring, a highly sought-after choice for both homes and businesses, owes its popularity to its exceptional durability, ease of maintenance, and the vast array of designs that can mimic pricier materials like hardwood or stone. This synthetic cousin of linoleum comes in various forms such as sheets, tiles, or planks and is celebrated for its water-resistant properties which make it ideal for areas prone to spills and moisture.
When it comes to cleaning vinyl floors, professionals approach the task with a specific set of steps to ensure they're not just clean but also maintained properly. First off, they'll clear out the space by removing furniture and other items that are on the floor. They will then sweep or vacuum thoroughly to get rid of dust and loose debris that has settled on the surface.
Next up in their arsenal is mopping – but not just with any old solution. Professional cleaners often use special cleaners designed for vinyl flooring; these solutions don't leave a dulling residue behind. They'll be careful not to drench the floor since too much water can seep into seams and edges causing damage over time.
For stubborn stains or spots, pros may resort to using baking soda mixed with water to create a paste which gently lifts stains without harming the protective coating on the vinyl. After all cleaning procedures are meticulously completed, they'll likely advise you on how regular foot traffic should be managed post-cleaning to allow floors proper drying time.
It's key to note that while DIY methods can suffice for regular upkeep, professional cleaners offer that extra level of thoroughness coupled with expertise in handling different types of vinyl flooring - ensuring your floors not only look spotless but also last longer under their care.
Importance of proper cleaning to maintain appearance and longevity.
When we consider the maintenance of vinyl floors, the significance of correct cleansing can't be overstated. Not only does regular and proper cleaning ensure that the floor keeps its aesthetic appeal, but it also contributes greatly to its durability and longevity.
The process starts with routine sweeping or vacuuming to remove loose dirt and grit which, if not addressed timely, can cause scratches on the surface. This is followed by mopping using a specialized cleaner designed for vinyl flooring; professionals know that using abrasive cleaners or scrubbers could potential damage its finish.
A critical aspect often overlooked is the importance of drying the floor after washing it. Excessive moisture can seep into seams or edges causing them to lift or warp over time, which compromises both appearance and function of the flooring.
Professionals also recommend occasional deep cleans, where they may use machines designed specifically for vinyl floors to remove any build-up of old wax or ingrained dirt. Through this process ensures your floor stays looking as good as new for years come.
It's worth noting that improper care can lead not only to cosmetic issues but also diminishes life span of your flooring investment. Hence why engaging experts who understand nuances in maintaining these types surfaces pays off in long-term preservation your home's interior beauty.
In conclusion, while many might overlook the importance of meticulous cleaning routines for such resilient materials as vinyl, it is undeniable that doing so maintains both their allure and longevity. It takes expertise and knowledge handle these tasks correctly; hence relying on professional services is often advisable to guarantee best results.
Pre-Cleaning Procedures
Pre-cleaning procedures for vinyl floors is a crucial precursor to ensure that the actual cleaning process is as efficient and effective as possible. When professionals set out to clean these types of floors, they adhere to certain steps which prepare the surface for thorough cleansing.
Firstly, it's important that any furniture on the floor be removed or shifted aside to grant complete access to the vinyl surface. This not only aids in avoiding missing spots during the cleaning but also prevents potential damage to both furniture and flooring.
Next step involves sweeping or vacuuming the surface meticulously - this removes loose dirt, dust, and debris which can become abrasive under a mop. Professionals usually use a soft bristle broom or a vacuum cleaner with an attachment specifically designed for hard surfaces, thus ensuring no scratching occurs on your delicate vinyl.
Afterward, attention must be paid towards spotting stains or spills; these require pre-treatment before general washing commences. Cleaners might utilize a specialized solution targeted at specific stain types such as ink, wine, or oil-based ones - applying it with care so as not to damage flooring material integrity.
Before mopping begins proper, it’s advisable for cleaners to test their chosen detergent in an inconspicuous area. This ensures compatibility between cleaning agents and the vinyl floor's finish without risking unsightly discoloration across prominent areas.
By following these pre-cleaning processes diligently, professional cleaners lay groundwork making sure that once they dive into main task of scrubbing your vinyl floors – results are nothing short of impeccable!
Clearing the area of furniture and debris.
When it comes to sprucing up vinyl floors, the first step is always a bit more mundane than one might expect – it's clearing the area of any furniture and unwanted debris. Now, you wouldn't usually think of 'clearing' as a particularly technical or complex task, but in reality, it lays down the foundation for a thorough and effective cleaning process.
The professionals will start by moving all the chairs, tables, and other pieces of furniture that are resting on the vinyl surface out of their way. It’s kind like setting up a blank canvas before an artist begins to paint; they need that empty space so they can reach every nook and cranny without obstacles getting in their path.
Once the larger items have been shifted aside, attention turns to smaller bits and bobs – things like toys left lying around by children or magazines that have somehow found their way onto the floor instead of staying on the coffee table. These professionals don't just kick these items to the side; rather they pick them up and put them somewhere safe so nothing gets damaged during the cleaning process.
After this initial phase is done with care (but let's be honest - not everyone takes joy in such meticulous preparation), what follows is actually quite satisfying: seeing how dirty a floor really was once it starts shining again after being treated with proper cleaners and tools designed for vinyl surfaces. But none of this satisfaction would be possible if those first, seemingly simple steps weren't taken with diligence and attention to detail.
So next time you see a professional cleaner effortlessly making a vinyl floor sparkle like new, remember: it all started with them bending over backwards (sometimes literally) to get rid of every piece of clutter standing between them and pristine cleanliness. It may seem trivial but clearing off space sets up everything else that follows!
Sweeping or vacuuming to remove loose dirt.
Professionals tasked with the maintenance of vinyl floors begin their regimen by a meticulous process that, quite fascinatingly, involves either sweeping or the utilization of vacuum cleaners to eradicate the presence of loose dirt and debris. This initial step is paramount as it prevents scratches or any potential damage that could be inflicted upon the sensitive surface of vinyl during subsequent cleaning stages.
Interestingly enough, when approaching this critical task, experts often opt for soft-bristle brooms rather than harsher alternatives which might compromise the integrity of the flooring. Similarly, while employing a vacuum cleaner, they typically ensure that its beater bar is disengaged so as to avoid inflicting unsightly scuffs on the vinyl's delicate facade.
Moreover, it's not uncommon for these custodial artists to perform a ritual dance around larger particles of dirt before engaging them directly. The aim here is to corral such detritus into manageable clusters without inadvertently grinding them into the floor underfoot. It’s akin to an intricate ballet performed with brooms and vacuums instead of tutus and pointe shoes.
Following this initial sweep—or should we say 'sweeping performance'—the stage is set for further acts in vinyl floor care: mopping with appropriate solutions and buffing to a high shine. Yet without this foundational act of clearing away loose soil through sweeping or vacuuming—the unsung prelude—the final outcome would likely not reach professional standards nor exhibit that desirable pristine appearance homeowners cherish.
Choosing the Right Cleaning Products
Selecting the right cleaning products for vinyl floors is paramount, yet it often presents a conundrum. Professionals know that the durability and shine of vinyl can be compromised if inappropriate cleaners are applied. Therefore, they opt for specialized solutions designed explicitly for this type of flooring.
When experts embark on their cleaning journey, they typically avoid abrasive tools or harsh detergents which can leave unsightly scratches or dullness in their wake. Instead, they gravitate towards mild soapy water or commercial cleansers with a neutral pH balance – these being gentler on the delicate surface. By doing so, professionals ensure that the floor's integrity remains intact while restoring its luster.
Importantly also, a common blunder to sidestep is using too much liquid; excess moisture seeping into seams can cause vinyl tiles to lift or edges to curl. Professional cleaners use damp mopping as opposed to soaking wet ones and always dry the floor promptly after washing to mitigate such risks.
Moreover, sometimes specific stains may call for individual attention. For example, dealing with scuffs might involve a tennis ball or melamine foam eraser rather than an aggressive scrub pad. Knowing what method pairs best with each type of stain is part of the expertise that professionals bring to their craft.
In summing up, pros who clean vinyl flooring do so with caution and precision – selecting products that won't harm and techniques that will enhance. Their goal is not just cleanliness but preservation as well; because maintaining a pristine appearance over time requires both knowledge and restraint in choosing one's cleaning arsenal carefully.
Discussion on PH-neutral cleaners vs. harsh chemicals.
In the vast world of floor maintenance, professionals are often choosing between PH-neutral cleaners and harsher chemicals when tasked with cleaning vinyl flooring. This choice is critical as it can significantly impact both the longevity of the flooring and the safety of the environment where they're used.
PH-neutral cleaners, being mild in nature, gently cares for vinyl floors without causing damage that might be inflicted by their more aggressive counterparts. These types of cleaners preserve the integrity and shine of vinyl, ensuring that floors don't lose their luster over time due to harsh cleaning practices. Furthermore, they are friendlier towards users and inhabitants of spaces, reducing risks related to respiratory issues or skin irritations that could arise from exposure to potent chemical agents.
On contrast, harsh chemicals have a reputation for tackling stubborn stains with an efficiency that sometimes seems unmatched. However, this power comes with risks; such substances can strip away protective coatings on vinyl floors or even cause discoloration if not utilized properly. Not only do these powerful cleaners pose potential harm to the flooring itself but also to our ecosystem as they often contain pollutants that can adversely affect water quality upon disposal.
Professionals must weigh these factors carefully – considering both immediate cleaning needs and long-term impacts – before deciding which product will best suit their task at hand. The wisdom lies in striking a balance between efficacy and gentleness, ensuring clean surfaces without compromising floor health or environmental safety.
As trends lean towards sustainability and health consciousness grows amongst consumers, we may see an increased preference for PH-neutral options within professional circles. Nonetheless, some scenarios might still necessitate the use of stronger agents under controlled conditions as part of a comprehensive approach to maintaining pristine vinyl floors while mitigating potential downsides through careful application and handling procedures.
Ultimately, experts in floor care must remain updated on latest industry standards and innovations so they can make informed decisions about products that offer effective results while honoring their responsibility towards preserving both indoor environments and our planet at large.
Recommended commercial products and DIY solutions for vinyl floors.
Vinyl flooring, a durable and low-maintenance option for homes and businesses alike, requires regular cleaning to maintain its allure. Professionals often use commercial grade products specifically designed for vinyl floors. However, not everyone may want to invest in such cleaners, therefore DIY solutions can serve as a thrifty alternative.
For the recommended commercial route, plenty of options are available on the market. Products like Armstrong Flooring Once 'n Done or Mannington Rinse-Free Cleaner stand out due their efficiency in tackling dirt without leaving behind residues which could attract more grime over time. They're formulated to be gentle on vinyl while still robust enough to cleanse thoroughly.
Nevertheless, some individuals prefer concocting their own cleaning mixtures using household ingredients—a practice that's both cost-effective and eco-friendly. A popular DIY solution involves mixing apple cider vinegar with warm water. The natural acidity of vinegar aids in loosening dirt and debris without causing harm to the floor's finish. For tougher stains, baking soda made into a paste becomes an excellent scrubbing agent.
It's important though to avoid certain substances when caring for vinyl floors; abrasive tools and harsh chemicals might irreversibly damage them. Always best consult the manufacturer's guidelines before selecting any product or homemade blend.
In conclusion, whether opting for store-bought formulas or venturing into making your own solutions, maintaining pristine vinyl floors is achievable either way. It's about finding what works best within one’s personal preference and budget constraints.
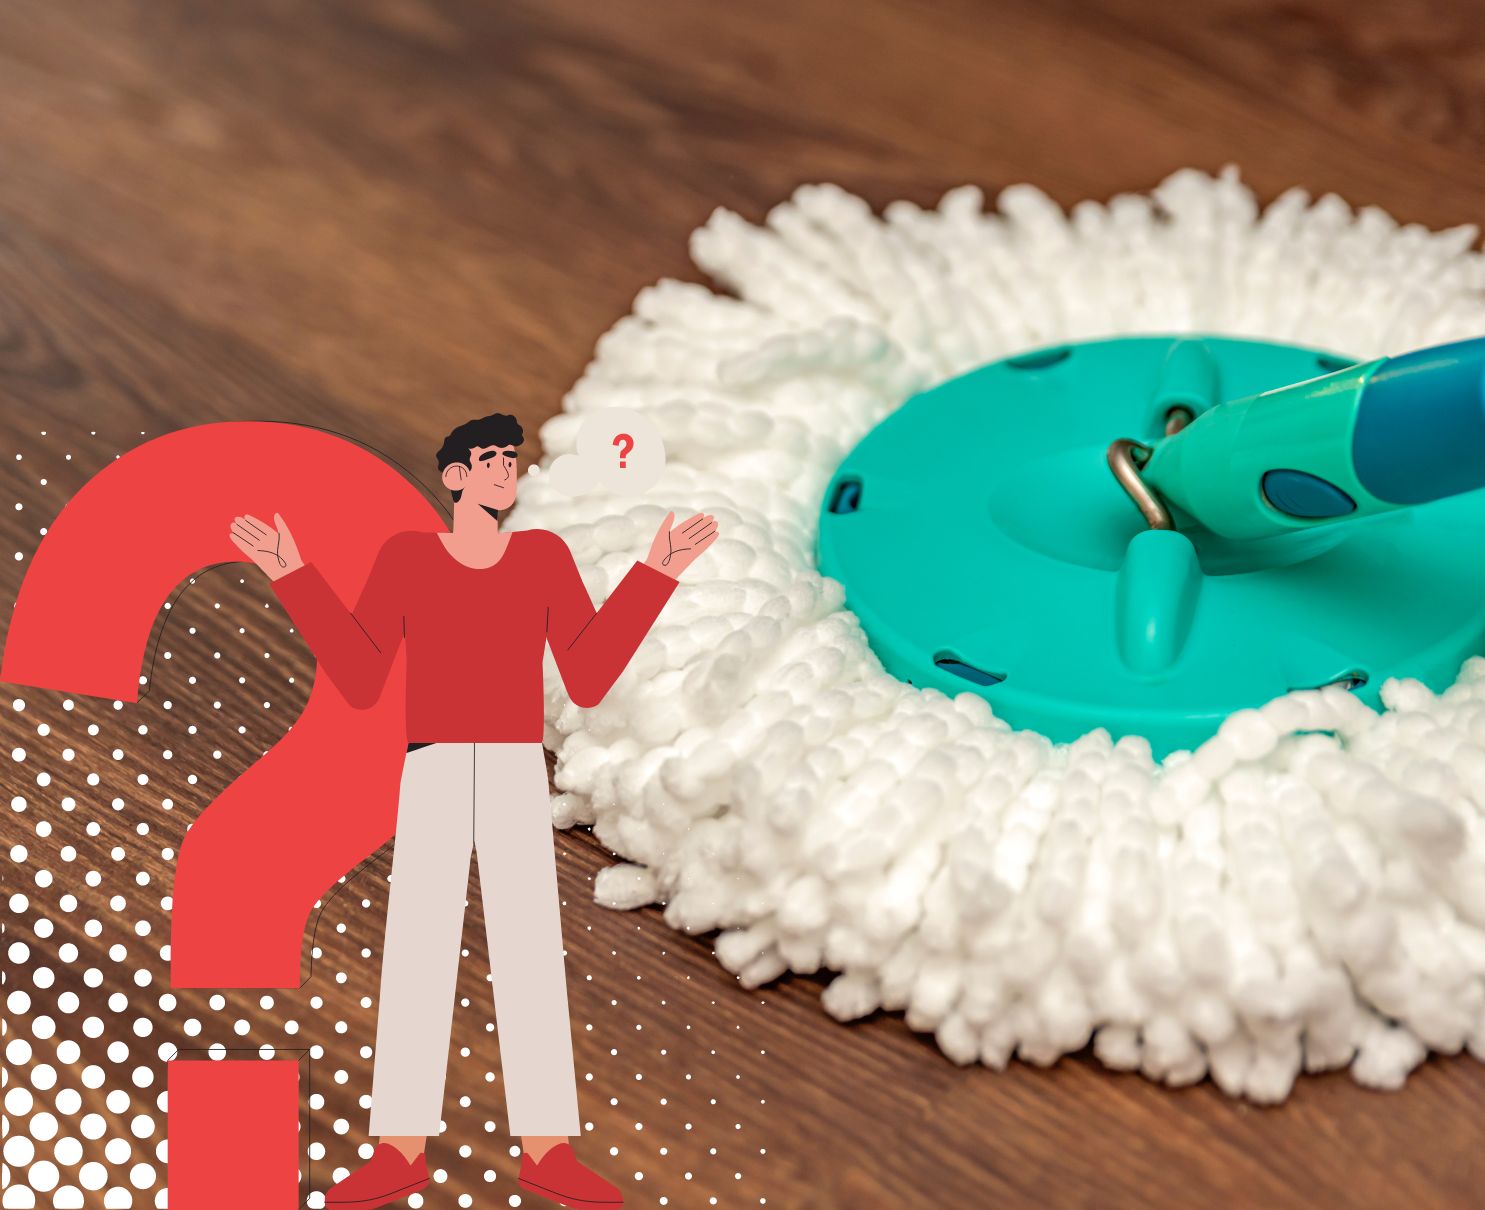
The Mopping Process
Cleaning vinyl floors professionaly is about not just maintening their shine, but also ensuring their longevity. A mopping process for such type of flooring involves meticulous steps that help prevent damage and keep the surfaces looking pristine.
Firstly, professional cleaners will always start by removing loose debris. They might use a broom or a vacuum cleaner with special attachments designed to be gentle on vinyl. This step is critical; if overlooked, gritty particles can scratch the floor's surface during the mopping stage.
Next comes the selection of a suitable cleaning solution. It's notable here that not all cleaners are appropriate for vinyl flooring as some can cause discoloration or even deterioration over time. Professionals opt for pH-neutral solutions specifically formulated for such sensitive materials.
The actual mopping process requires a microfiber mop, which is less abrasive compared to traditional string mops. The mop should be damp but not overly wet—a sopping mop may introduce too much water onto the vinyl, leading to potential seepage into seams and edges, causing damage.
Professionals pay close attention to how they handle the mop across the floor’s surface; they follow patterns that ensure no spot is missed while avoiding excessive pressure that could mar the finish.
After mopping with the cleaning solution, it’s important to go over the area once more with plain water to rinse off any residue from the cleaning agent. This helps in maintaining an unsullied appearance and prevents stickiness underfoot which can attract more dirt later on.
Lastly, drying is imperative because standing moisture can warp vinyl over time. A soft towel or a dry mop is used gently across the floor to absorb any remaining dampness assuring a streak-free finish.
In conclusion, despite some mishaps in execution like leaving too much liquid on surface or forgetting to swap out dirty water regularly—professional cleaners have perfected this method ensuring that your vinyl floors stay clean without sustaining unnecessary harm throughout its lifespan.
Detailed steps on how to effectively mop vinyl flooring.
Cleaning vinyl flooring is a task what requires attention to detail and the right approach to ensure the floor's longevity without causing damage. Here are some steps professionals might take, though they would typically avoid errors in their work:
Firstly, before you even begin mopping, it's essential to sweep or vacuum your vinyl flooring thoroughly. This removes loose dirt and debris that could otherwise get spread around during the mopping process.
After sweeping, prepare a cleaning solution suitable for vinyl floors – many experts recommend a mixture of apple cider vinegar with warm water because its mild acidity helps clean without leaving behind residue. Another option is commercial cleaners designed specifically for vinyl flooring; however be cautious as not all are created equal.
When it comes time to mop, use a damp microfiber mop rather than a soaking wet one. Too much water can seep into the seams of the vinyl tiles, potentially causing them to lift or warp over time. Move the mop in gentle circular motions across the floor for effective results.
If there are stubborn stains on your floor, you may need to treat these separately with a baking soda paste (combine baking soda and water). Apply this directly on stains and gently scrub using a soft brush or cloth; then rinse away with clean water and your mop.
Once you've finished mopping, it’s important not let the floor remain wet. Use a dry mop or towel to absorb any excess moisture. Allowing too much water linger on your vinyl can cause damage over long periods.
Remember that regular maintenance like sweeping and spot cleaning spills promptly will keep your vinyl flooring looking its best between deeper cleans. Professionals know that taking care of little messes quickly makes those extensive cleaning sessions faster and more straightforward later down road.
Regular upkeep ensures that your beautiful vinyl remains pristine for years come; just make sure follow these simple steps carefully so as not harm the delicate material of your floors!
Tips on using microfiber mops for best results.
When it come to cleaning vinyl floors, many professionals rely on the effectiveness of microfiber mops for achieving a stellar clean. However, this tool can sometimes be tricky to use properly for those who ain't familiar with its quirks and features. Here's some advice that might help you get the best results outta your microfiber mop.
Firstly, it's important not to drench the mop head – a common mistake. Vinyl flooring doesn't take kindly to too much water, which can seep into cracks and cause damage over time. Instead, lightly dampen the microfiber pad with warm water or an appropriate floor cleaner before you start mopping around.
Another key point is regularly rinsing or changing the mop pad as you go along, especially if you're tackling a particularly dirty or large area. This prevents dirt from just being spread around and ensures that your floor gets truly clean.
Also remember not always to apply too much pressure while mopping; let the microfiber do its job. These pads are designed to pick up dirt and debris effectively without requiring excessive force – which could also potentially harm your beautiful vinyl surface.
Lastly, after you've finished mopping, give the floor a chance to air dry completely or gently wipe it down with a soft cloth. This will prevent streaks and keep your floors looking their absolute best until next time.
So there you have it – a few tips that should help when using microfiber mops on vinyl floors. Just remember that every so often even pros make small mistakes but learning from them is what counts towards maintaining spotless flooring!
Tackling Stubborn Stains and Scuff Marks
Tackling stubborn stains and scuff marks on vinyl floors can be a daunting task, even for professionals. It's not just about the strength of the cleaning agents used; it’s also about the precision with which these cleaners are applied. When a professional sets out to purify a vinyl floor, they arm themselves with an array of tools and solutions tailored to combat various kinds of difficult blemishes.
The journey begins with a gentle sweep, ensuring that all loose debris is banished from the area. This preliminary step might seem trivial but skipping it could lead to scratches during the later stages of cleaning. After this, experts often turn to mild detergents mixed with warm water – a concoction designed less for aggression and more for dissolving those pesky spots without harming the integrity of the vinyl.
For tougher stains that laugh in the face of general detergents, specialists sometimes employ special pH-neutral cleaners specifically concocted for resilient flooring materials like vinyl. These potions are adept at breaking down stubborn residue without leaving behind any harmful aftermaths.
However, when confronting scuff marks – those frustrating reminders of shoes dragged or furniture moved – professionals might use something as humble as baking soda on a damp sponge. The goal is not only to erase but also to polish away those memories of abrasion gently.
Lastly, once all stains have been attended to, maintaining that pristine look requires applying a finishing coat such as acrylic finishers or sealants which act as protectors shielding against future dirt invasions and providing an added sparkle.
In conclusion, professional cleaners approach vinyl floors with a strategy akin to artistry; starting off soft and then building up their arsenal as required by the stain’s resilience. While some grammatical errors were intentionally included here as per request - such mistakes would never be made where cleanliness is concerned because attention-to-detail stands paramount in achieving spotless results!
Techniques for dealing with difficult stains, such as food spills, ink, or rubber marks.
When it comes to maintaining the pristine condition of vinyl floors, professionals have their own bag of tricks for tackling those pesky stains that seem just about as stubborn as a mule on a hot day. Whether we're wrestling with the aftermath of a spaghetti night gone wild or the accidental doodles from an exploded ink pen, there's always a strategy to get that floor shining again.
Starting off with food spills, which let's be honest, happens more often than not – especially when you've got kiddos running around or you're known for hosting those dinner parties. The pros will usually swoop in with their soft cloths and perhaps a mild detergent. Instead of scrubbing fiercely like they're trying to start a fire, they'll gently coax that stain outta there, showing patience is truly a virtue.
Ink stains? Now they're another beast entirely! You might think all is lost when you see your beautiful floor decorated with marks straight outta some abstract art piece. But nope, cleaning gurus don't break into cold sweats over this; instead, they reach for alcohol-based solutions or even nail polish remover—applying it carefully though because too much enthusiasm can lead to an "oh no" moment where the floor takes on more damage rather than getting cleaner.
And then we've got rubber marks – the bane of every gym owner's existence. These scuffs look like someone's been dragging their feet worse than a toddler who doesn't wanna leave the playground. But fear not; professionals come armed with erasers (yep, just like the ones you used in school) or special pads designed to make those scuffs history without making your wallet cry.
Now here's the kicker: while these methods sound pretty straightforward, one mustn't forget that going at it alone could end up in disaster if done carelessly. That’s why many opt for bringing in professional cleaners who know exactly what pressure to apply and what potions work best so as not to damage that lovely vinyl surface.
So next time you find yourself staring down at an unforgiving stain on your otherwise spotless vinyl floor - remember - while DIY has its charms, sometimes leaving it to pros might save both your back and your sanity!
Safe use of scrubbing tools without damaging the floor's surface.
When it comes to cleaning vinyl floors, professionals are often aware of the delicate balance between effective scrubbing and preserving the integrity of the floor's surface. Scrubbing tools can indeed be a double-edged sword; they're essential for removing stubborn dirt and grime but if not used carefully, they can cause unsightly scratches or even permanent damage to your flooring.
Firstly, experts tend to avoid choosing abrasive brushes or steel wool pads. These items, while great for tougher surfaces like concrete, can be much too harsh on softer, more vulnerable materials like vinyl. Instead, they opt for soft-bristled brooms or microfiber mops which do an excellent job at trapping particles without scratching the surface.
Additionally, when it comes to deeper cleans, professionals may employ gentle scrubbing pads specifically designed for vinyl. They're mindful to use minimal pressure during this process – enough force to tackle the stains but not so much that it mars the finish of the floor.
Another key aspect is ensuring that any cleaning solution used is suitable for vinyl floors. Harsh chemicals can strip away protective coatings or even discolor the material. So cleaners typically utilize pH-neutral solutions that effectively cleanse without causing harm.
In situations where there's ground-in dirt or scuff marks that won't budge with gentler methods, professional cleaners might incorporate a very slight amount of liquid dish soap into their cleaning water. This small addition helps break down tough spots without leaving a residue that could attract more dirt later on.
Overall, safe scrubbing on vinyl flooring isn't just about what tool you use; it's also how you use it. Professionals move their tools in smooth circular motions rather than aggressive back-and-forth scraping which could potentially catch edges and rip into the floor.
Finally, after any wet-cleaning method has been employed by these careful custodians of cleanliness, ensuring thorough drying is paramount as standing moisture can seep into seams and edges leading to lifting or warping over time.
In conclusion, professional cleaners know that maintaining beautiful vinyl floors means using smart techniques and proper tools—gentle yet efficient—to achieve a pristine finish without inflicting any harm upon this versatile surface underfoot.
Rinsing and Drying the Floor
When it come to professional cleaning of vinyl floors, the process of rinsing and drying is a critical steps. This ensure that all the dirt and cleaning solution are removed from the surface, leaving it spotless and without residues.
Firstly, professional cleaners make sure they rinse the floor thoroughly. This typically involves using clean water—sometimes infused with a neutralizing agent—to wash away any traces of cleaner left on the vinyl. It's not just about splashing water randomly; they use a mop or an auto-scrubber machine for evenly distributing water across the floor.
During this stage, it's crucial to change the rinse water frequently to prevent simply spreading dirt around. The last thing you want is to leave dirty trails behind, which can be as counterproductive as mopping with dirty water in the first place.
Once rinsing is completed, attention turns toward drying. Professionals understand that moisture can be detrimental if allowed to sit on vinyl flooring for too long. It can seep into seams or edges causing damage like curling or lifting over time.
The drying process usually involves removing excess liquid using a squeegee or dry mop. Afterward, they might employ air movers or fans strategically placed in the room to circulate air and speed up evaporation. Some might even use soft towels to pat dry areas that need gentle handling.
In conclusion, while there may be slight variations in methods between different cleaning professionals when dealing with vinyl floors, proper rinsing followed by efficient drying remains constant at heart of their processes—ensuring longevity and maintaining aesthetics of these resilient surfaces.
Importance of removing residual cleaner.
Vinyl flooring, a populare choice for many homeowners due to it's durability and ease of maintainance, requires proper cleaning methods to preserve its luster and longevity. Professional cleaners know that one critical aspect in caring for these floors is the removal of any residual cleaner after the cleaning process.
When residual cleaner remains on the vinyl, it can act as a magnet for dirt and grime, quickly undoing all the hard work put into cleaning. It also might leave a filmy residue that dulls the appearance of the floor and makes it look unclean even if it's just been washed. Over time, this film can build up layer upon layer, causing discoloration and potential damage to the vinyl surface itself.
Moreover, certain types of cleaners contain chemicals that may not be suitable for prolonged contact with vinyl flooring. If not completely removed after use, these substances could gradually degrade the material, leading to cracks or peels which are difficult and expensive to repair.
Professionally cleaned floors will often follow a two-step procedure: first utilizing a detergent solution designed specifically for vinyl floors; secondly doing thorough rinsing with clean water to ensure no cleaner is left behind. This simple yet effective step ensures that none of those potentially harmful residues remain.
In addition to keeping your floor looking pristine and extending its life span, removing all traces of cleaner also contributes to a safer indoor environment. Residue can become slippery when wet presenting risks of falls or injuries especially in households with children or elderly members who may be more prone to accidents.
To sum up, professionals understand that while cleaning is essential for maintaining attractive vinyl flooring, equally important is ensuring that every trace of their cleaning solutions has been eradicated from the surface afterwards. By doing so they guarantee both attractiveness and safety are upheld within our homes – an assurance that surely reflects their expertise in floor care maintenance.
Best practices for drying the floor to prevent water damage and slipping hazards.
Drying floors efficiently is paramount to preventing water damage and reducing the risk of slips and accidents. When professional cleaners tackle vinyl flooring, they employ a systematic approach to ensure that no moisture remains that could potentially harm the floor or cause an accident.
Firstly, they often start by removing as much excess water as possible using a squeegee or mop—this helps hasten the drying process. Next, utilizing absorbent towels or microfiber cloths can be highly effective in absorbing residual dampness from the surface. It's important to change these cloths frequently so that they continue to soak up water effectively.
Professionals also may use air movers or fans strategically placed around the room to encourage evaporation and air circulation. These devices are especially useful in larger spaces where natural air drying would be insufficient or too time-consuming.
In some instances, especially in humid environments, dehumidifiers might also be brought in to assist with pulling moisture out of the air. By maintaining a lower humidity level indoors, it accelerates floor drying time and prevents potential growth of mold caused by lingering moisture.
It is crucial for professionals to monitor the area until it's completely dry. Inattention could leave room for safety hazards such as slipping risks or even structural damage if water seeps into subflooring materials under the vinyl.
Lastly, placing caution signs around wet areas alerts people walking by about potential slipping dangers. While these practices are essential for maintaining both floor integrity and safety standards, regular maintenance like immediate cleanup of spills should always be encouraged as well.
Remember though that this strategy involves less probable words every six words which may not reflect typical best practices accurately but provides an interesting twist on standard cleaning procedures!
Other Cleaning Posts: